Door DevOps
Door DevOps builds a container from a Git repository and runs it as an application. You connect the repository, Door builds an image, and you deploy that image into an environment.
The environment has to exist first. A Project Owner or a Super Admin creates it in Door Hub, on a cluster Door can reach. A developer then deploys into it. Connecting a cloud account, and connecting the registry, are not part of this path. Publishing the running application on a hostname is Door APIM.
In the sidebar, Code, Pipelines, and Apps sit under Applications. Environments and Registry sit under Infrastructure. Pipelines opens a page titled Builds.
Connecting a Git provider does not create a pipeline. The first Build & Deploy does, for a new code: it creates the pipeline, starts the first build, and deploys when that build succeeds. A later successful build does not update an application that is already running.
The first deploy, in one sitting
Assume the environment already exists and its cluster says Ready. The names below are an example. Yours can differ.
- Open Code. CONNECT on GitHub, GitLab, or Bitbucket, and approve access on that site. You do not paste a token.
- New Code. Name the code
orders. The hint under Name is Must start with a lowercase letter, and contain only lowercase letters, numbers, and hyphens. Pick the framework that matches the repository. NextJS is only the default. Add the branch, usuallymain. - Leave Docker File Path at
/Dockerfilewhen the file is at the repository root. If the repository has no Dockerfile, leave the path anyway: the form says Cloudoor generates one during the build. A file in a subdirectory gets that path, for example/services/api/Dockerfile. - On 2. Deploy, choose the environment, shown as
project/environment. Set the port to the port the process listens on. 8080 is the default on this form. A generated Node or Next.js image often listens on 3000. - Leave Public Exposure off when the hostname you want is one you own. That hostname is Door APIM, after the application is running. Public Exposure on this form publishes under a domain Door already has for that cluster.
- Build & Deploy creates the code, the pipeline configuration named dev, the first build, and the application after that build succeeds. This guide describes the button. It does not ask you to start a build you do not want.
Open Pipelines while it runs. The stages are Git checkout, Image build, Image scan, Image push, and Deploy. Dockerfile generation appears when Cloudoor wrote the file.
A green build and an application that did not change
After the first deploy, a new green build stores a new image. The running application stays on the version it already has, until one of these happens:
- You open the application and choose Upgrade Version.
- Auto Deployment is on for that application, so a newly pushed image rolls onto it.
- You deploy again from Apps, or from the Deploy card on the build.
Auto Deployment starts off. Turn it on when every successful build on that branch should become the running version.
Two ways onto Apps
| You have | Start at |
|---|---|
| A Git repository Door should build | Code, then Add Code |
| An image that is already in a registry | Apps, then Deploy New App, then Registry |
Helm and Door Services on New Deployment say Coming Soon and stay disabled.
Start here
- Sign in at https://door.cloud and select your organization.
- Use an environment whose cluster is reachable. If it does not exist yet, create the project and the environment in Door Hub. The cluster is either one Hub already has, or a Door Kubernetes cluster.
- Open Code. Connect GitHub, GitLab, or Bitbucket, then Add Code. See Connect Git and add code.
- Leave the Dockerfile at
/Dockerfile, or set another path. If the repository has no Dockerfile, the form says Cloudoor generates one during the build. See Dockerfile and the build. - On Pipelines, follow the build. The page title is Builds. See Pipelines.
- Open Apps for the running application. To deploy an image that is already built, start from Apps instead of Add Code. See Applications.
When the organization has one registry, Add Code uses it and hides the picker. A Super Admin connects that registry. See Registry, for a Super Admin.
Once the code exists, its own page is where you track a branch, set the scan severity, and deploy again. The demo organization has no code, so that page has no picture. See After the code exists.
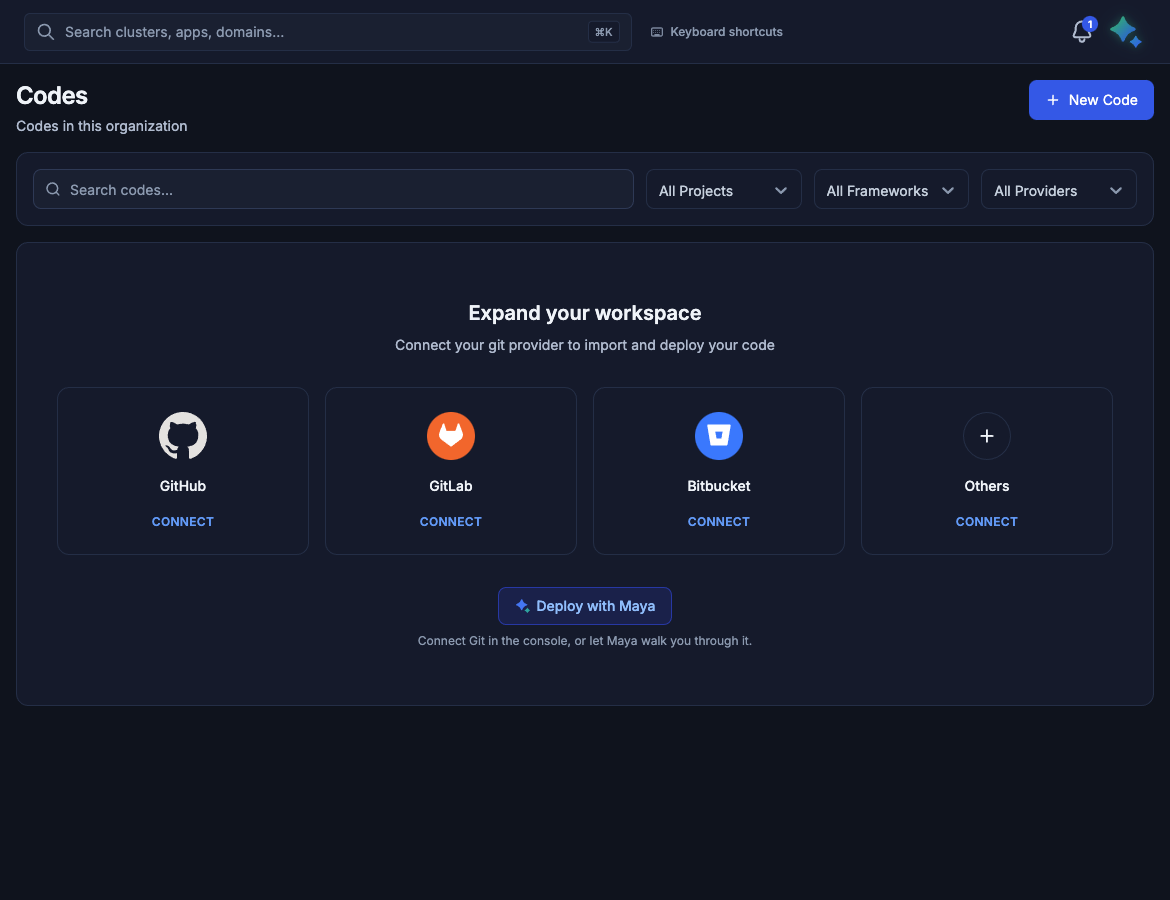
Codes in the demo organization. CONNECT on GitHub, GitLab, or Bitbucket starts the provider sign-in. Others opens Add Code.
Guides
| Guide | What you will do |
|---|---|
| Connect Git and add code | Connect a provider, name the code, start the first build, then use the code page |
| Dockerfile and the build | Root Dockerfile, a custom path, or a generated Dockerfile |
| Pipelines | Follow builds, read logs, start a build again |
| Applications | Deploy from a code or from a registry, and turn on Auto Deployment |
| Environments and registry | The registry a Super Admin connects. The environment form is in Door Hub |
What the console calls each thing
| You see | What it is |
|---|---|
| Code | The repository Door builds, plus the build settings (name, framework, branches, Dockerfile path). |
| Pipelines / Builds | The list of build runs: status, duration, logs. |
| Apps / Applications | The running application in an environment. |
| Environment | Where the application runs. One namespace on one cluster, inside a project. |
| Registry | Where the built image is stored. A Super Admin connects it. The demo organization uses Harbor. |