Cloudoor APIM
Cloudoor API Gateway is a Layer-7 API gateway shipped as a self-contained container. As soon as it starts, a setup wizard checks the environment, installs the required dependencies, and opens a secured admin console. In under a minute you can publish your first route: the gateway issues the TLS certificate, encrypts traffic immediately, and enforces a Zero-Trust model that authenticates and authorizes every request via your identity sources (OIDC, signed tokens).
Under load, its high-performance engine scales horizontally: with just 4 vCPUs it sustains 50,000 requests per second while keeping P99 latency below 80 ms. Elasticity is automatic—no downtime, no manual reconfiguration: capacity follows real-time metrics.
The gateway unifies heterogeneous architectures. It routes HTTP/1.1, HTTP/2, gRPC, and WebSocket traffic to legacy apps on VMs or bare-metal servers as well as to Docker or Kubernetes microservices and serverless functions. All flows converge on a single entry point, continuously monitored through ready-to-use dashboards, drastically reducing MTTR. With this foundation, your teams deliver faster without sacrificing security or visibility, whatever the cloud or datacenter.
Core Concepts
Endpoints
Endpoints serve as the primary entry points for external traffic into your services, defining the interface through which clients interact with your backend applications. They are essential for managing traffic and security of your APIs, allowing you to control how requests are routed and processed. Now, let's explore the step-by-step process of creating an endpoint.
Your Traffic and Security Policy can be managed for each endpoint.
Auth Servers
Auth Servers are crucial for securing your APIs by managing authentication and authorization. They define how clients prove their identity and gain access to your protected resources. Door APIM supports OIDC, Basic, and Token authentication types, offering flexibility for various security needs.
Domains
Domains serve as the human-readable addresses that users type into their browsers to access your APIs. They are essential for branding and organizing your API endpoints. Proper domain configuration ensures your APIs are easily discoverable and accessible. The Domains & TLS section allows you to manage these domains, including their security settings (TLS/SSL certificates) to encrypt traffic.
Gateways
Gateways are central to modern API architectures, acting as the main entry point for external requests to backend services. They manage and route API traffic, improving security, performance, and efficiency. Essentially, API gateways centralize management, security, and optimization for a reliable, secure, and scalable API infrastructure.
Prerequisites and Configuration
To successfully set up your Door APIM, a few key steps must be completed. This guide will walk you through the necessary prerequisites and configuration procedures.
Prerequisites
Before proceeding with the APIM setup, ensure the following prerequisite is met:
- An Added Cluster: You must have your own Kubernetes Cluster (not needed if you use the default cloudoor-managed cluster).
- Onboard this cluster on your Cloudoor or Door Africa organization here.
Configuration
Once the necessary prerequisites are in place, the core configuration of your APIM involves setting up several critical components. Navigate to the following configuration sections to tailor your APIM environment:
-
Gateways: Configure your own API Gateways, which act as the entry point for external requests to your backend services. A default gateway will be installed and configured automatically when the cluster is onboarded to Door. But you can add additional Gateways.
-
Domains: Establish the domains that will be used to access your APIs. Proper domain configuration ensures that your APIs are reachable through user-friendly and recognizable addresses. You must configure the DNS to point to the gateway address.
-
Authservers: Set up your Authorization Servers to manage the security and access control for your APIs. This involves configuring how clients will authenticate and obtain authorization to interact with your protected resources.
By carefully configuring these Gateways, Domains, and Authservers, you will lay the foundation for a robust and secure APIM environment. Refer to the linked documentation at the end of the page for detailed instructions on each configuration step.
Detailed UI Navigation
You can access your APIM by clicking the APIM button at the top part of your screen in the UI.
When we click on the APIM Button, we’ll first land in the Endpoints Summary Dashboard, we’ll see something like this.
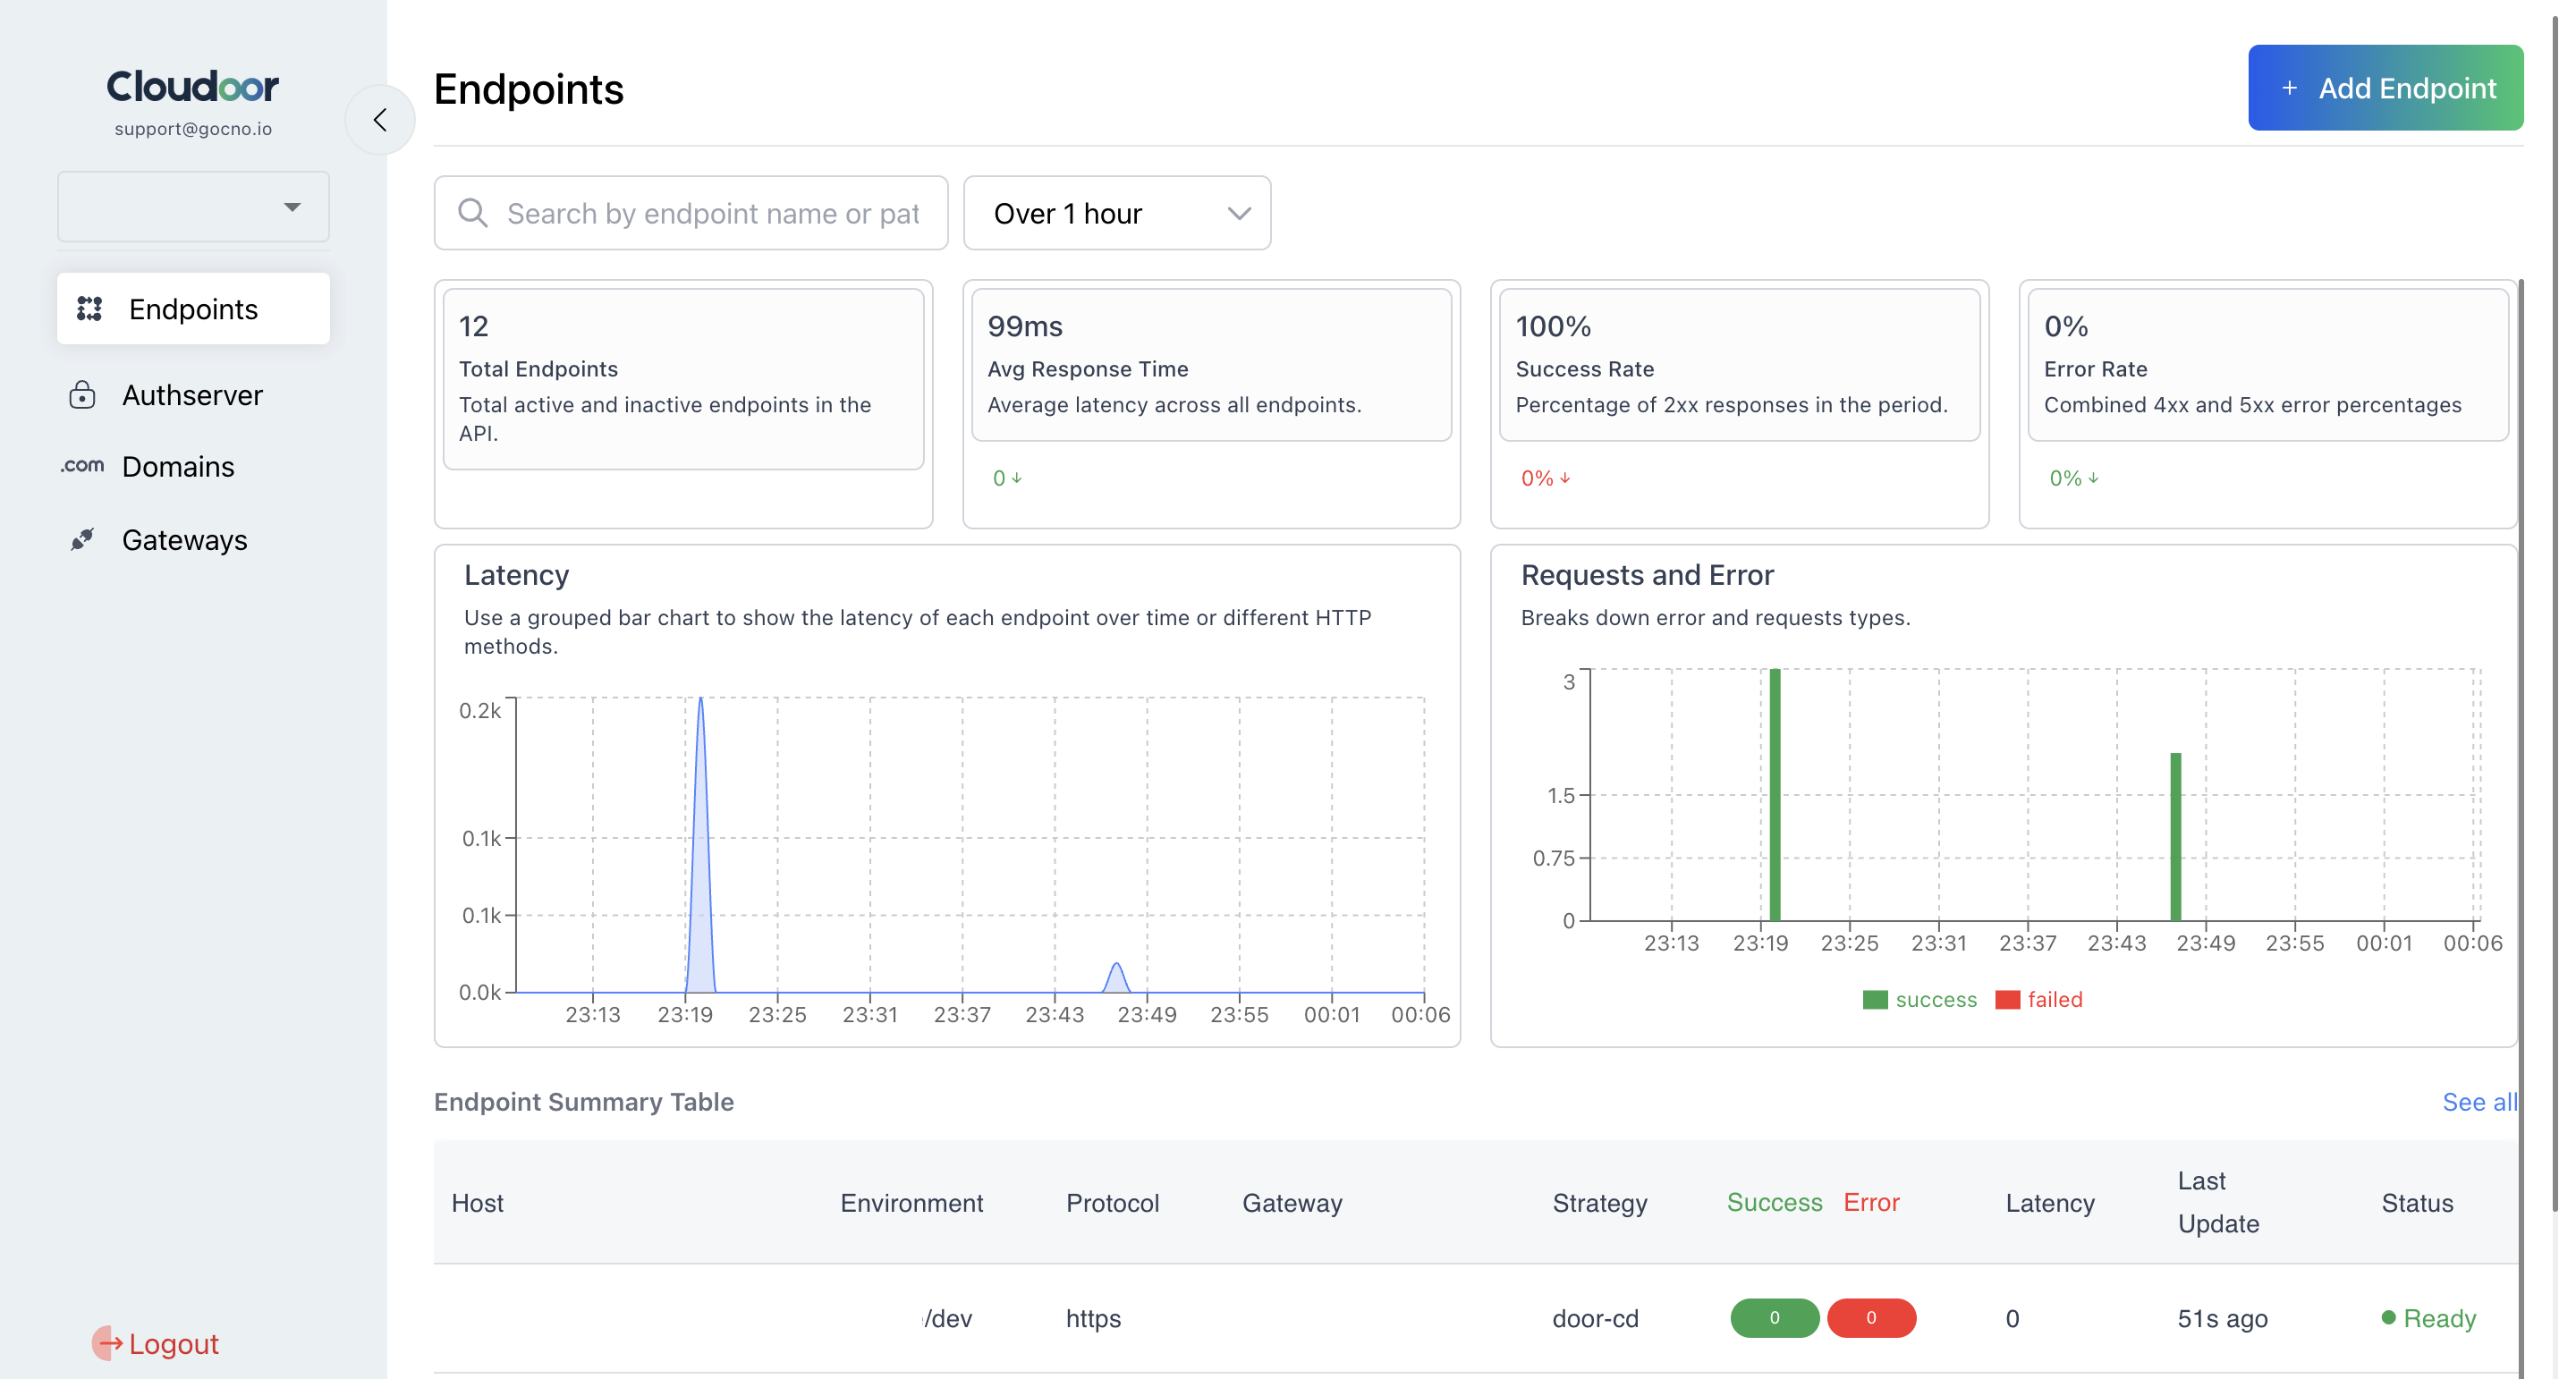
The left navigation panel provides access to key management sections, including Endpoints, Auth Servers, Domains, and Gateways. Detailed information about each section is provided in subsequent sections of this document.
The right-side dashboard displays key performance metrics for all endpoints. These metrics include Total Endpoints, Average Response Time, Success Rate, and Error Rates. An "Add Endpoint" button is also present.
Below the metrics, two graphical tables visualize endpoint data: a latency graph and a bar chart depicting Requests and Errors.
Finally, the Endpoint Summary Table lists all configured endpoints. Users can select individual endpoints from this table to view and modify their settings.
By carefully configuring these Gateways, Domains, and Authservers, you will lay the foundation for a robust and secure APIM environment for adding Endpoints. Refer to the linked documentation for detailed instructions on each configuration step.
Further research
- Configuring Endpoints: Endpoints
- Configuring Gateways: Gateways
- Configuring Domains: Domains
- Configuring Authservers: Authservers