Auth Servers
Auth Servers are crucial for securing your APIs by managing authentication and authorization. They define how clients prove their identity and gain access to your protected resources. Door APIM supports OIDC, Basic, and Token authentication types, offering flexibility for various security needs.
In the following sections, we will explore the different types of Auth Servers supported and guide you through the process of managing them within your organization.
On the Auth Server dashboard, you have an overview of all auth servers in your organization.
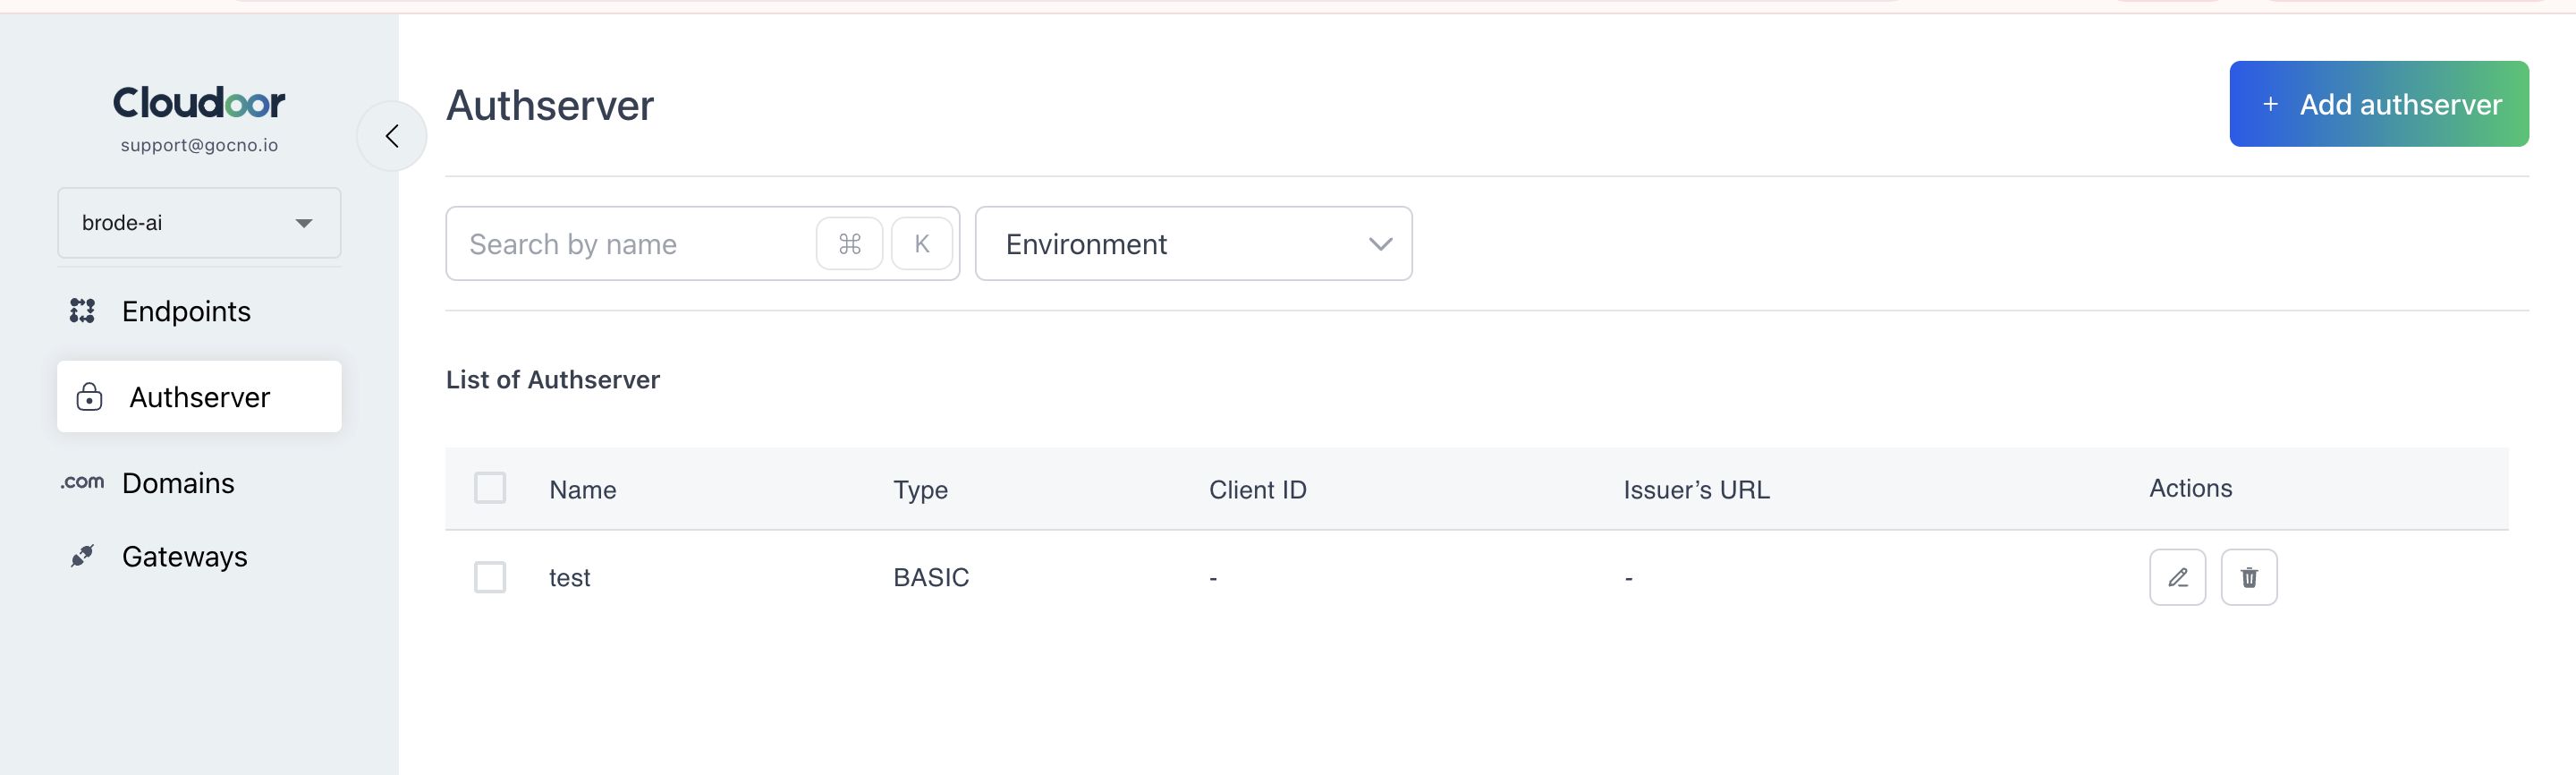
You can filter your view of endpoints by Environment by choosing an environment from the environment drop-down menu on the top bar. You can also edit and delete each authserver.
You can also add new authservers by clicking the “Add authserver” button at the top right.
Adding New Authservers:
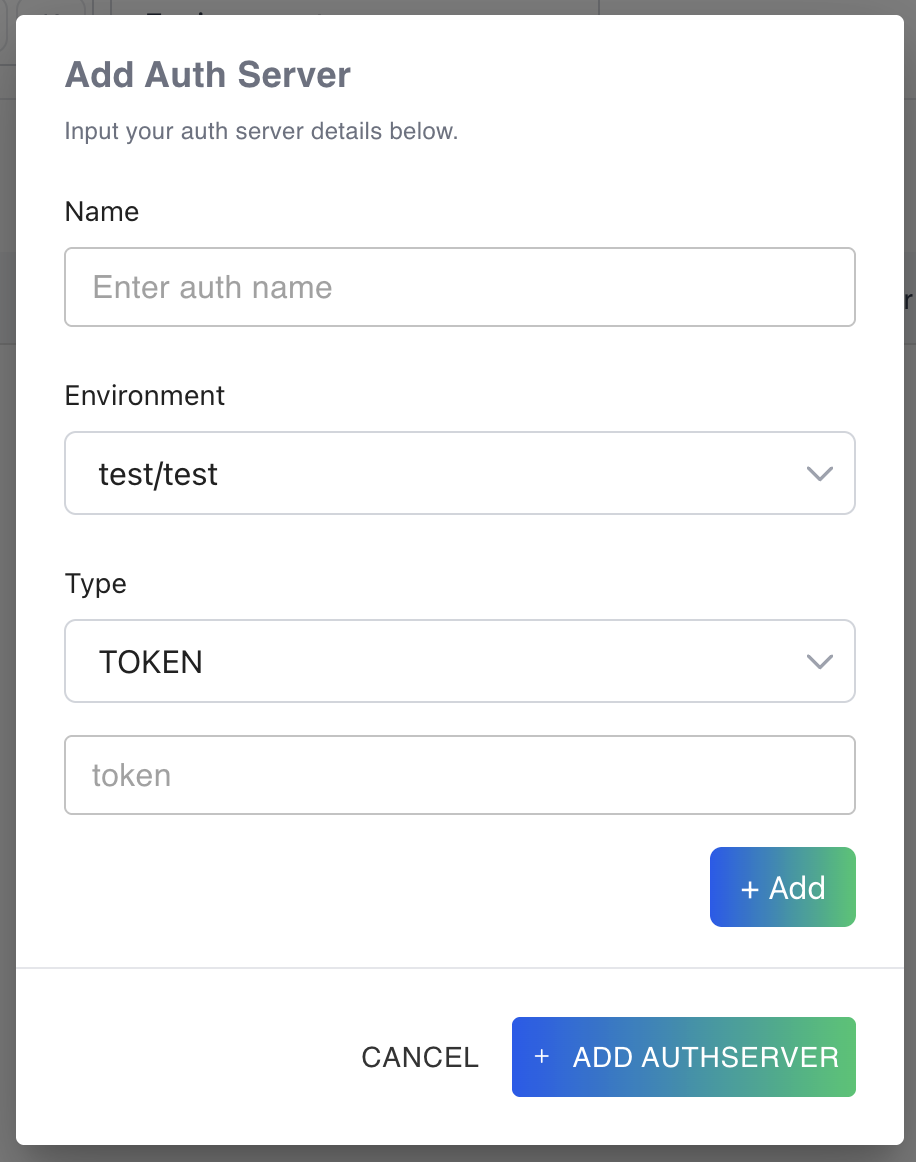
When you click the “Add authserver” button, a pop-up form will appear.
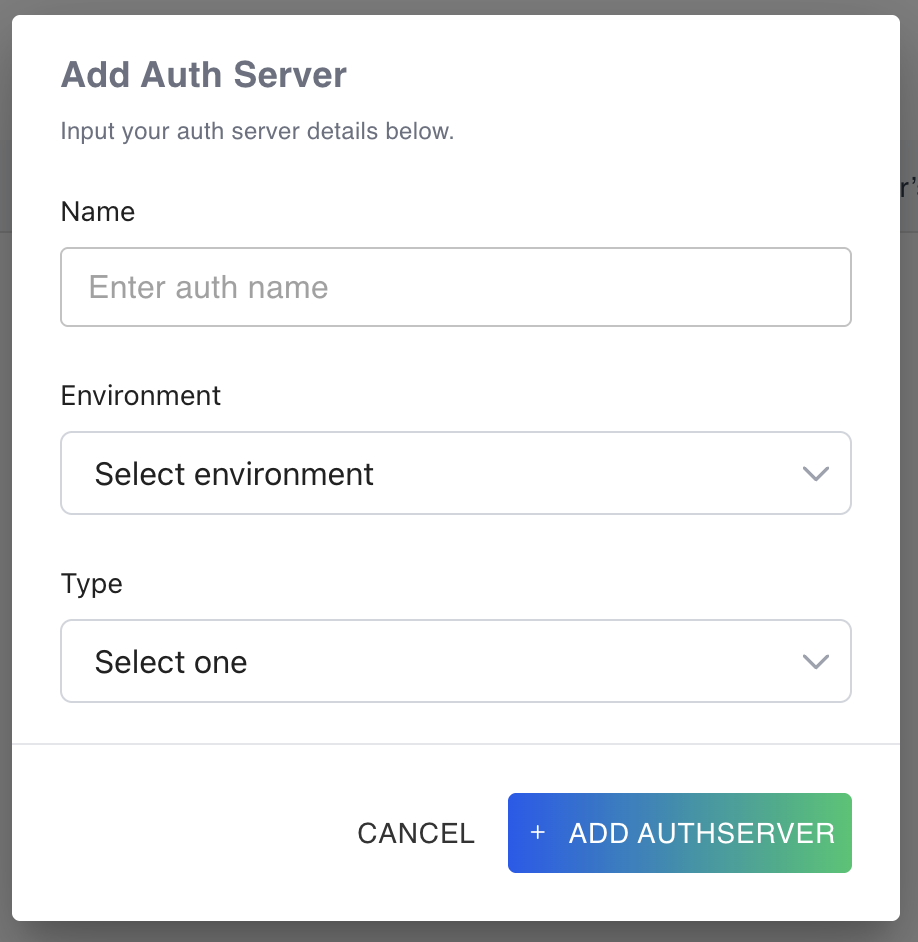
You can enter the name, choose the environment this authserver will apply to and the type. Door currently supports 3 Types. * OIDC * Basic * Token
Types of AuthServers Door APIM currently supports three types of authentication servers: OIDC, Basic, Token
OIDC:
OIDC (OpenID Connect) is an authentication layer built on top of OAuth 2.0, enabling clients to verify the identity of an end-user based on the authentication performed by an authorization server, as well as to obtain basic profile information about the end-user.
To add an OIDC Auth Server, follow these steps:
Choose OIDC from the Type dropdown.
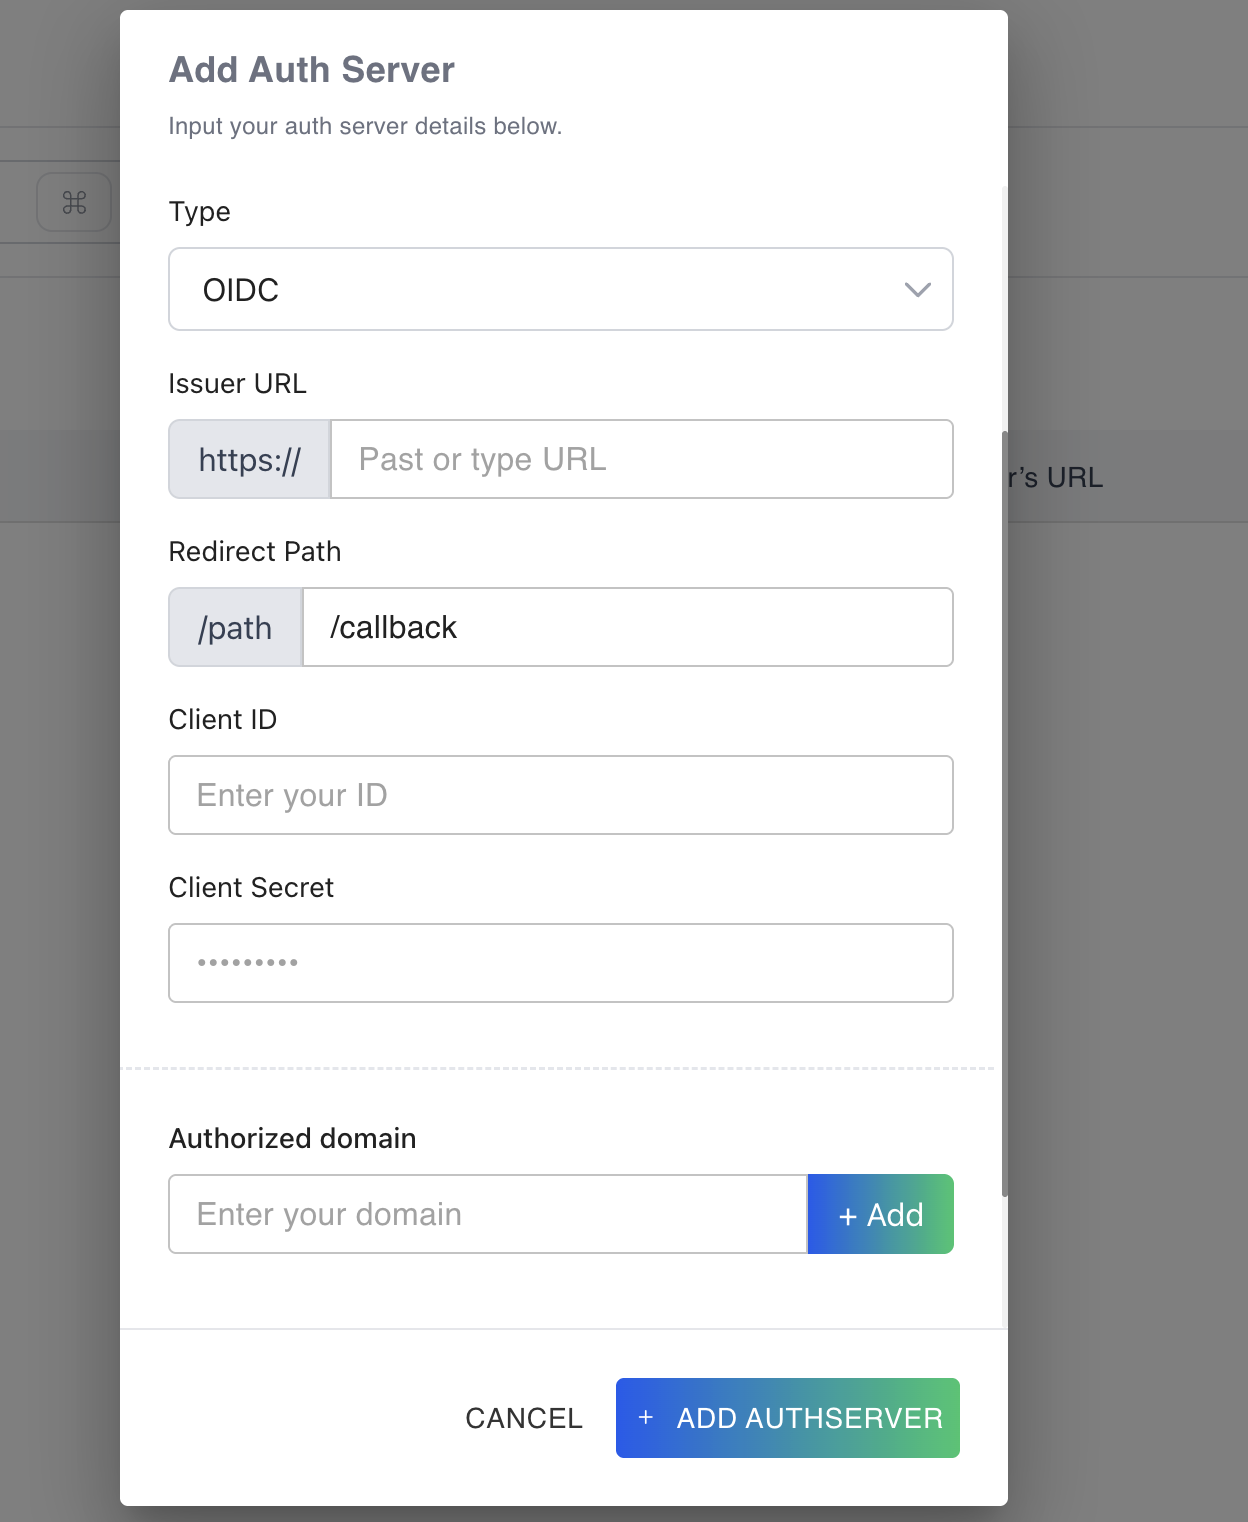
Fill the form with these values:
- Issuer URL
- Redirect Path
- Client ID
- Client Secret
- Authorized domain
- Advanced Settings (Optional)
- Username Claim
- Email Claim
- Role Claim
- Group Claim
NB: If an OIDC authentication server is linked to an endpoint, unauthenticated browser users are automatically redirected to the configured identity provider (e.g., Keycloak, Okta, Azure AD). The gateway issues an OAuth 2.0 / OIDC "authorization request." The user then signs in on the provider's login page, grants consent if necessary, and is redirected back with an ID token and an access token. The gateway verifies the token signature and authorizes the request.
For non-interactive API calls, you must manually provide the access token by adding the following header:
Authorization: Bearer <access_token>
where <access_token> is the JWT obtained from the identity provider (e.g., via the Client Credentials or Authorization Code flow).
Basic:
For Basic authentication, you simply provide a username and password. This method sends credentials as a base64 encoded string in the request header.
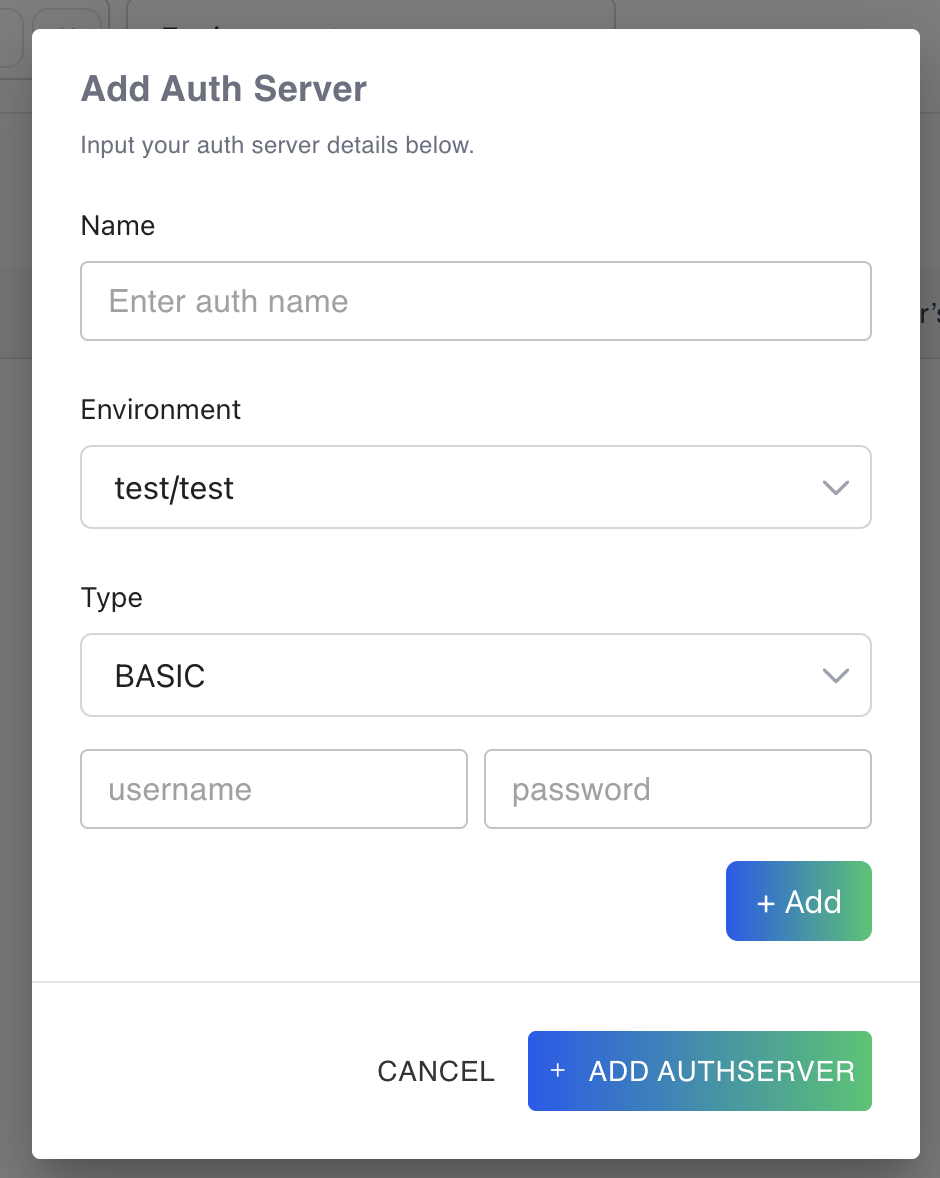
Adding a Basic Auth Server
- On the "Add authserver" pop-up form, choose "Basic" from the Type dropdown.
- Enter the desired username and password.
- To add more username/password pairs, click the "Add" button.
NB: If a Basic-Auth provider is configured on an endpoint, any user who tries to open the URL in a browser will receive an HTTP 401 challenge (WWW-Authenticate: Basic realm="Door-APIM"); the browser automatically displays a dialog asking for a username and password. For non-interactive API calls (curl, Postman, code, etc.) the credentials must be sent explicitly in the request header like this:
  curl -H "Authorization: Basic $(echo -n 'apiuser:secret' | base64)" \
     https://api.example.com/v1/orders
Token:
The Token authentication server type in Door APIM allows you to configure and use various tokens, such as static JWT tokens, to secure your endpoints.
You can add multiple tokens by clicking the add button.
NB: When a Token Authserver is configured on an endpoint, the client must include a valid token in the request header, using the format:
Authorization: Bearer <token>